Add Images
To visually distinguish business and system requirements, add SVG images for each type. You can either create them yourself in a graphics editor or reuse the examples provided in this guide.
Create a file named BusinessRequirement.svg:
<svg xmlns="http://www.w3.org/2000/svg" viewBox="0 0 200 70" width="200" height="70"
     preserveAspectRatio="none">
  <rect class="stroke stroke-dasharray"
        x="1" y="1" width="198" height="68" rx="3"
        fill="white" stroke="#bfbfbf" stroke-width="2"
        vector-effect="non-scaling-stroke" />
  <path class="fill fill--stroke"
        d="M4 1 H196 a3 3 0 0 1 3 3 V5 H31 V69 H4 a3 3 0 0 1 -3 -3 V4 a3 3 0 0 1 3 -3z"
        fill="#f59e0b" stroke="#f59e0b" stroke-width="2"
        vector-effect="non-scaling-stroke" />
  <rect x="7" y="25" width="18" height="22" rx="2"
        fill="none" stroke="white" stroke-width="2" />
  <path d="M12 25v-3h8v3 M11 30h10 M11 35h10 M11 40h6"
        fill="none" stroke="white" stroke-width="2"
        stroke-linejoin="round" stroke-linecap="round" />
  <rect id="label" x="33" y="7" width="164" height="60" fill="none" />
</svg>
Create a file named SystemRequirement.svg:
<svg xmlns="http://www.w3.org/2000/svg" viewBox="0 0 200 70" width="200" height="70"
     preserveAspectRatio="none">
  <rect class="stroke stroke-dasharray"
        x="1" y="1" width="198" height="68" rx="3"
        fill="white" stroke="#bfbfbf" stroke-width="2"
        vector-effect="non-scaling-stroke" />
  <path class="fill fill--stroke"
        d="M4 1 H196 a3 3 0 0 1 3 3 V5 H31 V69 H4 a3 3 0 0 1 -3 -3 V4 a3 3 0 0 1 3 -3z"
        fill="#94a3b8" stroke="#94a3b8" stroke-width="2"
        vector-effect="non-scaling-stroke" />
  <path d="M6 25h7c0-4 6-4 6 0h7v7c4 0 4 6 0 6v7h-7c0-4-6-4-6 0H6v-7c4 0 4-6 0-6z"
        fill="white" />
  <rect id="label" x="33" y="7" width="164" height="60" fill="none" />
</svg>
Note that some elements in the SVG files use CSS classes. These allow you to dynamically change colors and styles based on entity attributes.
Available styling parameters:
- fill — primary fill color
- stroke — primary border color
- stroke-width — primary border width
- stroke-dasharray — primary border style
- secondary-fill — secondary fill color
- secondary-stroke — secondary border color
- secondary-stroke-width — secondary border width
- secondary-stroke-dasharray — secondary border style
For example, if you configure high-priority business requirements to appear in
red, the system will find all elements with the fill class in the SVG and
replace their fill attribute with red.
If your shape color is defined via the stroke attribute, use the combined
class fill--stroke. The naming convention is: [styling parameter]--[SVG
attribute].
The SVG also includes a rectangle with the ID label. This is a technical element that defines the area where the entity’s label (name) will be displayed. It ensures that the text does not overlap with the icon on the left.
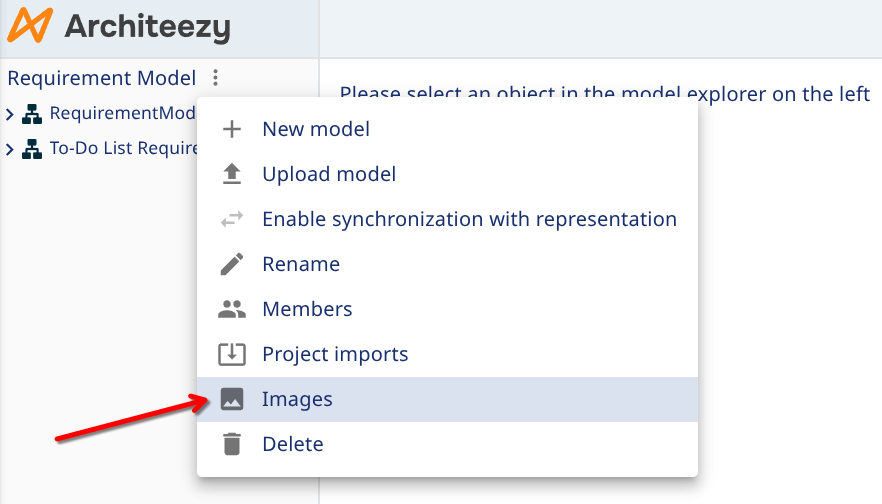
Open the project menu and go to Images, then upload the files you created:
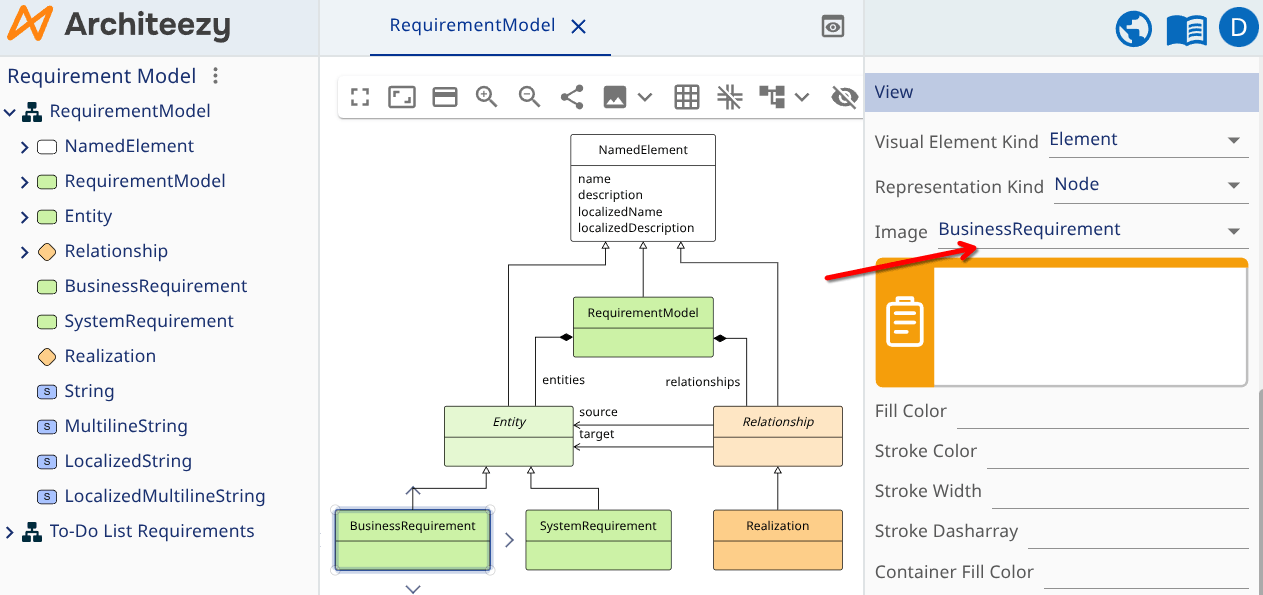
Select the BusinessRequirement class in your metamodel, and in the Representation section of the properties panel, choose the uploaded image from the dropdown:
Repeat the same steps for SystemRequirement.
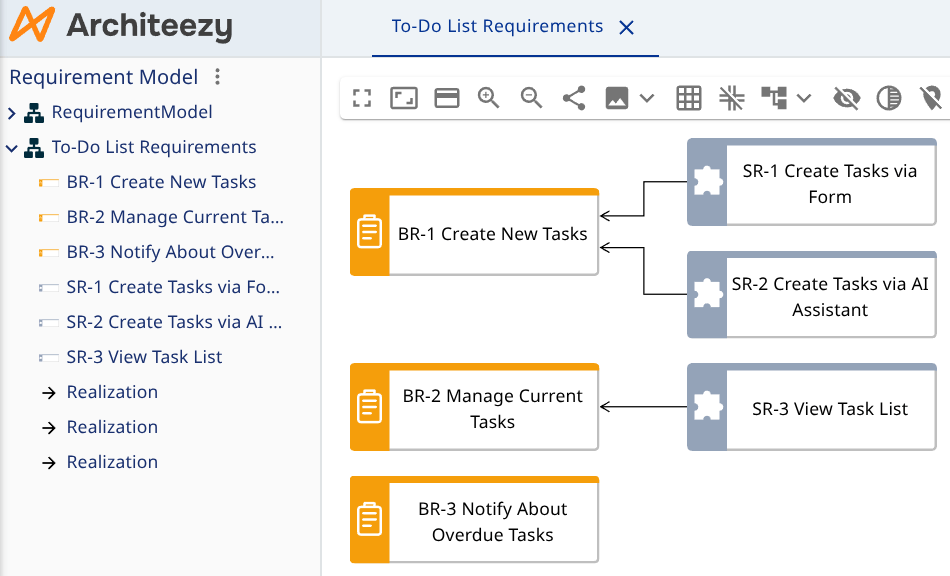
Now open your requirements model and verify that the diagram displays the new icons instead of the default rectangles: